How to use a track matte in Adobe Premiere.
1. Start Premiere, and import your footage, any Digital Hotcakes background, and the matte. Place your footage on Video 1, the Digital Hotcakes background movie on Video 2 and matte on Video 3.

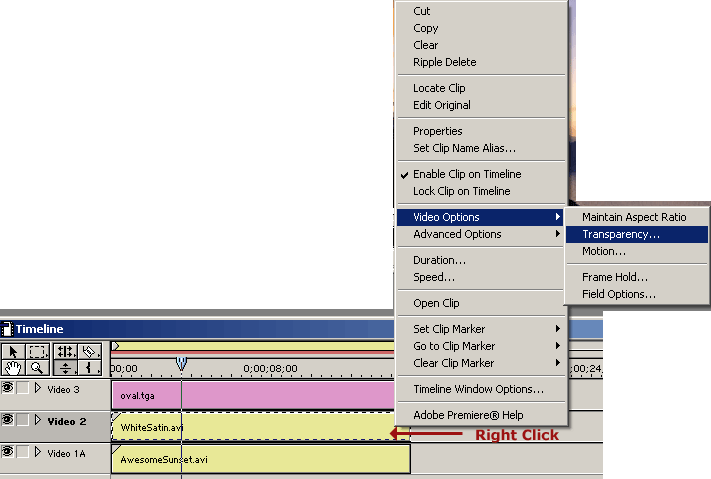
2. Right mouse click on Digital Hotcakes background movie in Video Track 2 to bring up the menu found below. Select Video Options>Transparency

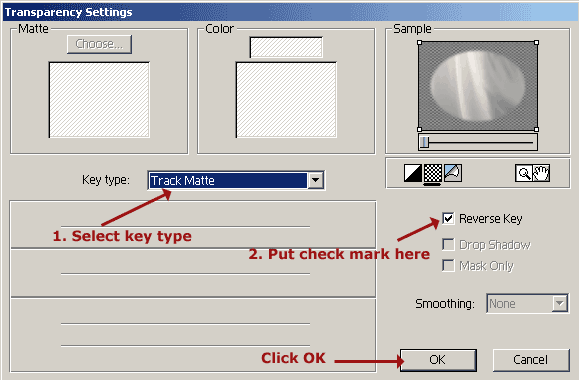
3. Select Track Matte from the pull-down list of key types. Put a check mark in Reverse Key. Then press okay.

4. Right click on the oval matte track to bring up the Video Options menu again. Select Transparency.
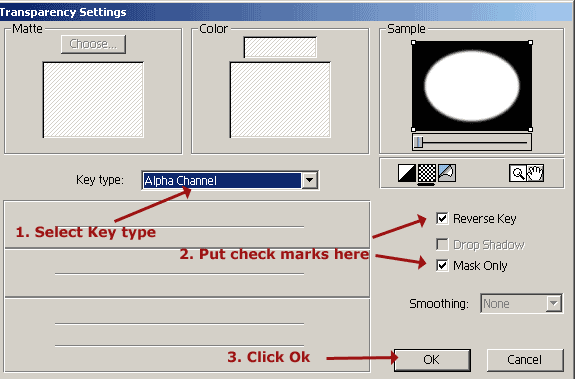
5. Select Alpha Channel from the pull-down list of key types. Put a check mark in Reverse Key and Mask Only. Then press okay.

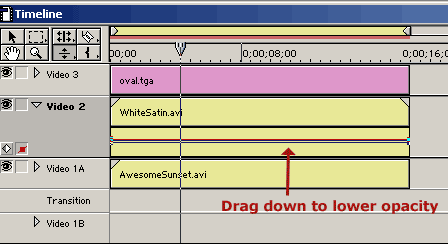
6. To adjust the opacity on the Digital Hotcakes background found on Track 2, click the triangle to the left of the track name to expand the track. Select the fade adjustment tool.

7. Drag the line segment down. You can set the opacity of the entire clip to a constant value by adjusting the opacity rubberband in this manner.

8. Render. The result should look something like this.

Copyright © 2004 TriLab Productions. All rights reserved.